Category: Crochet Patterns | Quick & Easy Projects Skill Level: Easy / Beginner Estimated Time: 2–3 hours
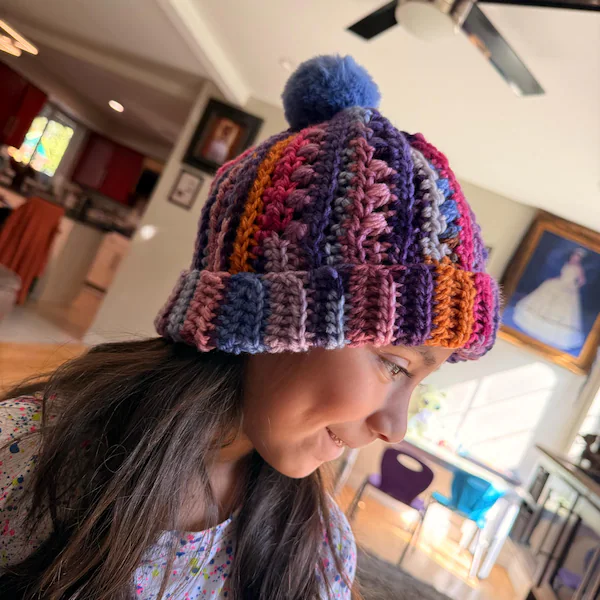
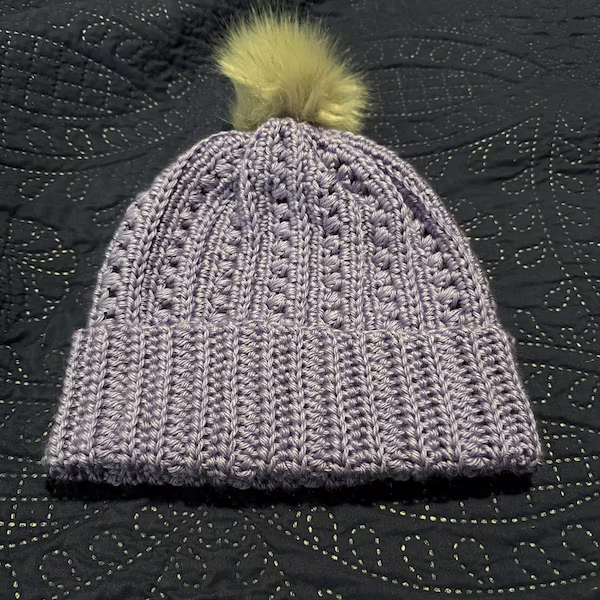
If you’re looking for the perfect weekend project, this cozy ribbed beanie is it. It works up quickly, uses just one skein of yarn, and the ribbed texture gives it that classic, store-bought look — even if it’s your very first hat. Whether you’re crocheting for yourself, a friend, or getting a head start on holiday gifts, this pattern is beginner-friendly and endlessly customizable.
Grab your hook and a cozy skein of yarn, and let’s get started!
Materials Needed
- Yarn: Worsted weight yarn (#4), approximately 150–180 yards for an adult size
- Hook: 5.0 mm (H-8) crochet hook
- Yarn needle: for weaving in ends
- Scissors
- Stitch marker (optional, but helpful for tracking rounds)
Abbreviations & Skill Level
This pattern is rated Easy, making it a great project if you’re new to crochet or want a quick, relaxing make.
- Ch – Chain
- Sl st – Slip Stitch
- Hdc – Half Double Crochet
- BLO – Back Loop Only
- St(s) – Stitch(es)
- Rnd – Round
Gauge & Sizing
This pattern is written for an adult universal fit (approximately 21–23 inch head circumference). Gauge isn’t critical for this project since the ribbing has natural stretch, but if you’d like to check: 14 hdc and 10 rows = 4×4 inches.
Step-by-Step Instructions
Step 1: Create the Ribbed Band
The ribbing is what gives this beanie its cozy, stretchy fit, and it’s created by working in rows rather than rounds.
- Ch 11 (or adjust for a snugger or looser fit — every 2 chains adds roughly 1 inch of stretch).
- Row 1: Hdc in the 2nd chain from the hook and in each st across. Turn. (10 sts)
- Row 2 onward: Ch 1, hdc in BLO across. Turn.
- Repeat Row 2 until your strip measures long enough to wrap around the head comfortably with a slight stretch (usually about 20–21 inches for an adult).
Step 2: Join the Band into a Circle
Fold the strip so the short ends meet, and sl st them together to form a ring. Don’t turn the ribbing inside out — this seam will sit at the back of the head.
Step 3: Build the Crown
Now you’ll work in rounds along one long edge of the ribbed band to create the top of the hat.
- Rnd 1: Ch 1, evenly space about 30–34 hdc around the edge of the band. Join with a sl st to the first st.
- Rnd 2–3: Ch 1, hdc in each st around. Join.
- Rnd 4 (decrease round): Ch 1, hdc in next 4 sts, hdc2tog repeat around. Join.
- Rnd 5: Hdc evenly around. Join.
- Rnd 6 (decrease round): Hdc in next 3 sts, hdc2tog repeat around. Join.
- Continue decreasing every other round, spacing decreases evenly, until about 8–10 sts remain.
Step 4: Close the Top
Cut the yarn, leaving a long tail. Thread it through a yarn needle, weave it through the remaining stitches, pull tight to close the hole, and secure with a knot on the inside.
Step 5: Weave in Ends
Use your yarn needle to weave in all loose ends neatly, and trim any excess yarn.
Finishing Touches
- Pom-Pom: For an extra cozy touch, attach a faux fur or yarn pom-pom to the top of the beanie.
- Brim fold: Fold up the ribbed band slightly for a classic cuffed look, or leave it unfolded for a slouchier style.
- Embellishments: A small button, appliqué, or contrasting stripe can easily personalize this pattern for gifting.
Frequently Asked Questions
What yarn weight works best for this beanie? Worsted weight (#4) yarn gives the best balance of warmth and stitch definition, but this pattern also works with a chunky (#5) yarn if you want a thicker, faster-working hat — just size up your hook to 6.0 mm.
How long does it take to crochet this beanie? Most beginners finish this project in about 2 to 3 hours, making it an ideal one-sitting or weekend project.
Can I make this pattern for a child or adjust the size? Yes! Simply reduce the number of starting chains for the ribbing (shorter band = smaller head circumference) and reduce the total stitch count in the crown rounds proportionally.
My beanie is coming out too loose. What did I do wrong? This usually means your ribbing strip was made too long before joining, or your tension is looser than average. Try wrapping the band around your head before joining to check the fit, and adjust the row count as needed.
Can I use this pattern to sell finished items? This pattern is intended for personal, non-commercial use. If you’d like to sell finished items made from it, please reach out to us first — see our Disclaimer page for details.
Loved this pattern? Pin it for later, tag us in your finished beanie photos, and check out more cozy, beginner-friendly patterns on My Cozy Hook!